AI Agents
The AI Agents page is a visual graph builder for autonomous agents. You lay out nodes on a canvas — an agent, the skills it can use, and the triggers that start it — connect them, and deploy. Agents run on the platform's execution engine, with shell and Python skills running inside an isolated microVM.
Requires an active configuration. Select one on the Settings page first.
Agent graphs
One configuration can hold several named graphs. When you open the page you first pick an existing graph or create a new graph (name must start with a letter; a-z, 0-9, _).
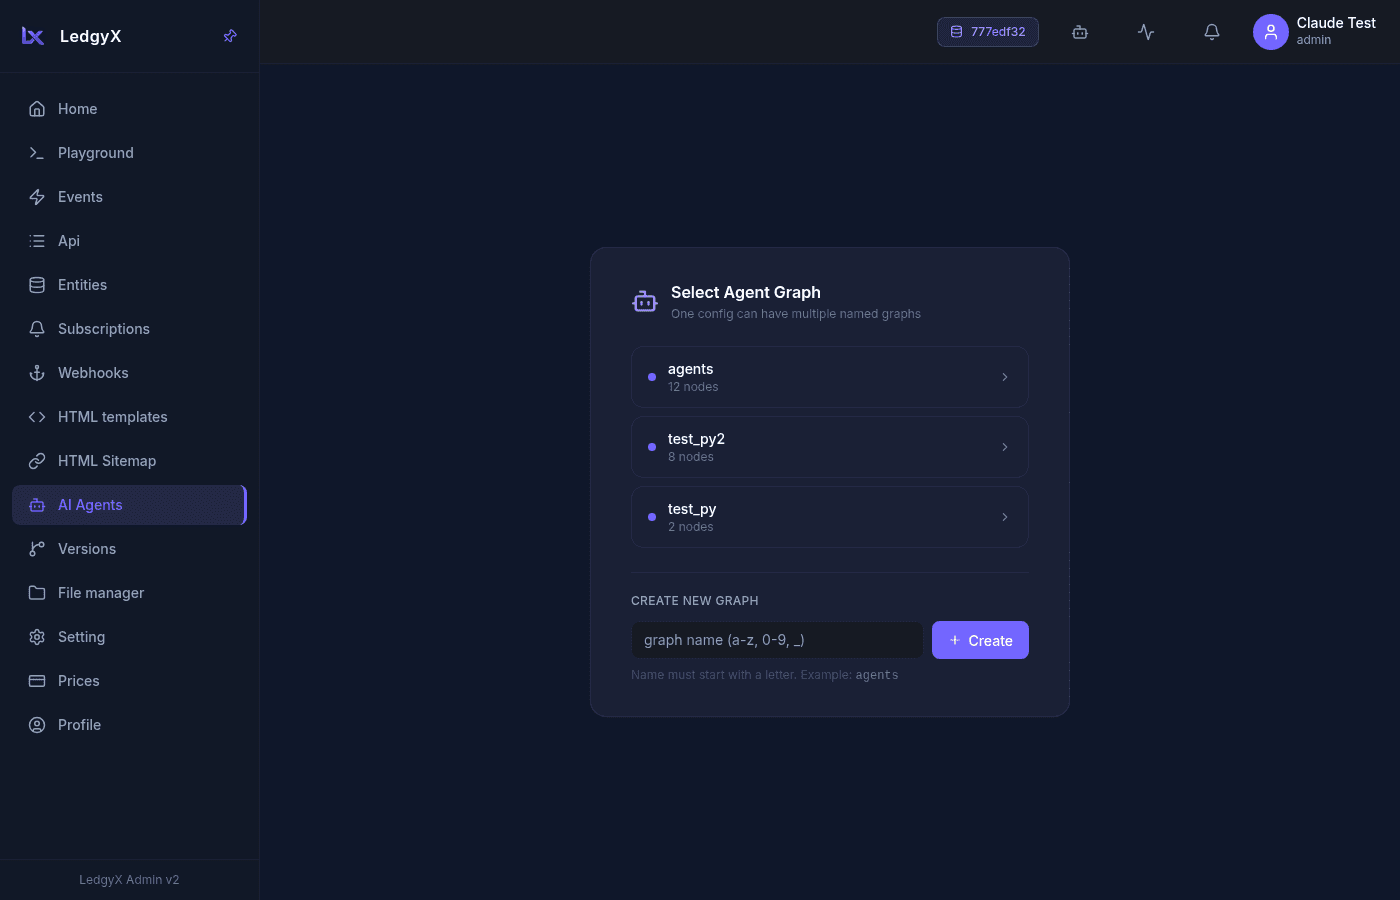
If a config has no graph yet, an Initialize Agent Graph button appears — it provisions the per-config storage the graph needs.
The canvas
Opening a graph shows the node canvas.
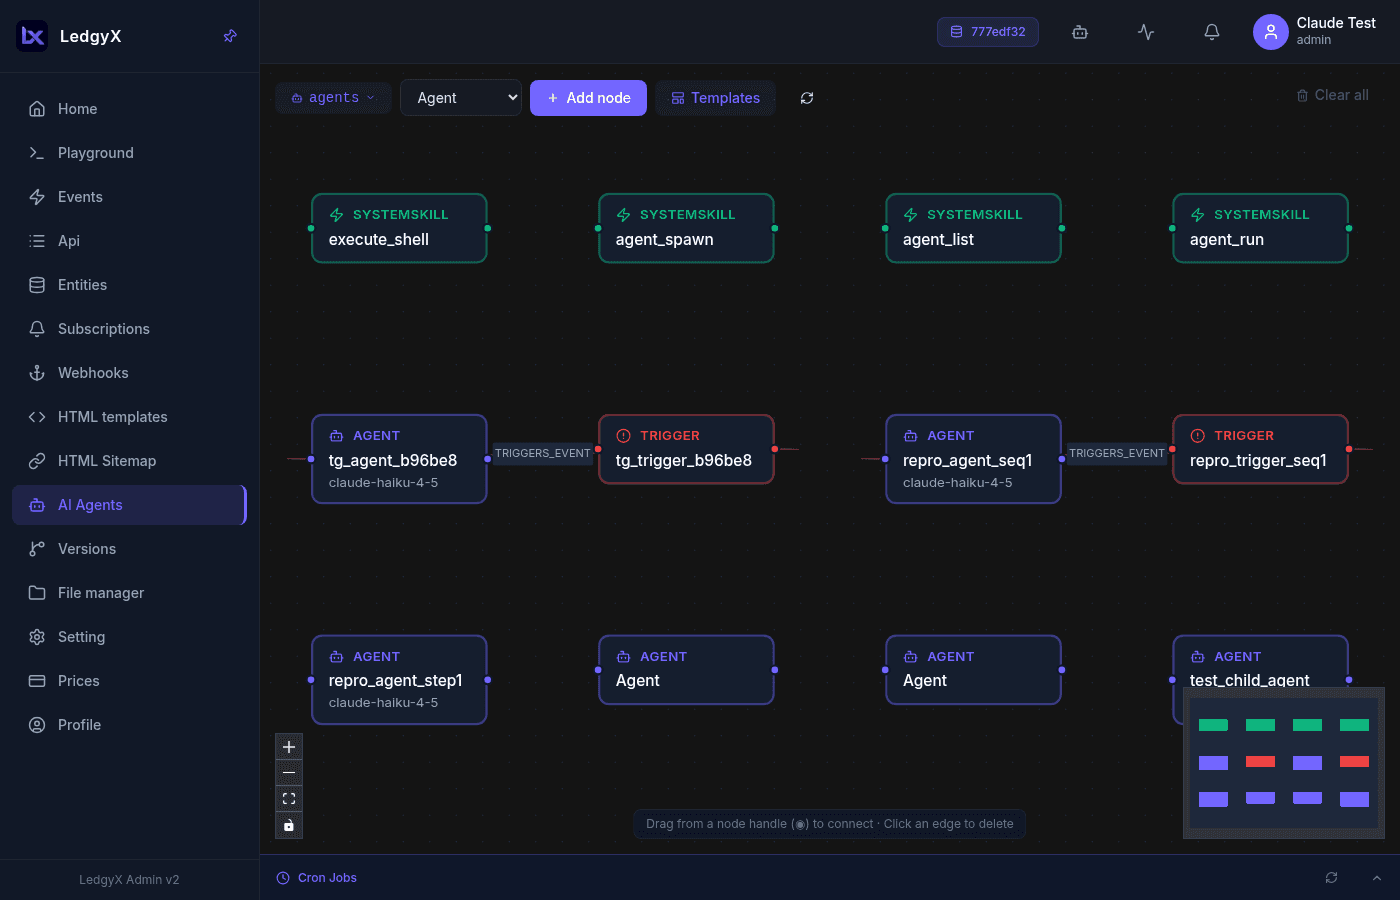
Nodes are colour-coded by type:
| Node | Colour | Purpose |
|---|---|---|
| Agent | violet | The reasoning unit — has a model, system prompt, and iteration limit |
| SystemSkill | green | A built-in tool (e.g. execute_shell, telegram_reply, agent_spawn) |
| UserSkill | amber | Your own Python/shell script, registered from a source file or SKILL.md |
| Trigger | red | What starts the agent — Telegram, webhook, cron, or text input |
| Event | blue | A platform event the agent can call |
| Knowledge | purple | A knowledge source attached to an agent |
Toolbar (top-left): the graph selector, a node-type dropdown, + Add node, Templates, and Refresh.
Connecting nodes
Drag from one node's handle to another to create an edge. The platform validates the pair:
- Incompatible → an error toast, no edge.
- One valid edge type → the edge is created immediately (e.g.
Trigger → Agentauto-creates aTRIGGERS_EVENTedge). - Several valid types → a small modal lets you pick (e.g.
Agent → SkillusesHAS_SKILL).
Click an edge and confirm to delete it.
Authoring loop
- Add nodes — an Agent, the skills it needs, and a trigger.
- Set properties — select a node to open the Inspector (right panel). For an Agent: name, model, system prompt, temperature, max iterations, autopilot. For a UserSkill: name, description, executor (
execute_python/execute_shell), source file, and input schema — or click Load SKILL.md to fill these from a manifest file. - Connect — Agent → skills (
HAS_SKILL), Trigger → Agent (TRIGGERS_EVENT). - Register UserSkills via the Inspector's Skill section.
- Deploy Agent — the Inspector's Deploy button publishes the agent so the execution engine picks it up.
- Activate the Trigger — this auto-creates a platform event whose SQL calls the agent, so an incoming Telegram message / webhook / cron tick fires it. For a
webhooktrigger you get a copyable/webhooks/{token}URL; fortelegram, the bot's webhook is registered automatically; forcron, the schedule is registered as a job.
Monitoring runs
Select an Agent node and switch the Inspector to the Runs tab. Each run shows a status dot, the task text, step count, and timestamp; a stopped/failed run shows a short reason preview. Click a run to see its steps — each step lists its type, skill name, iteration, duration, token counts, and any error.
SKILL.md format
A UserSkill can be defined by a manifest with YAML frontmatter:
---
name: my_skill
executor: execute_shell
input_schema: {"type":"object","properties":{"cmd":{"type":"string"}}}
---
# Implementation notes ...
Related:
- AI Builder — build a whole project (including agents) by chatting
- AI & external services (SQL) — the
CALL(AGENT ...)and AI functions - Events · Subscriptions